Free Henna Tattoo Stencils: Your Ultimate Guide to Beautiful Designs
Want to adorn your skin with the intricate beauty of henna but lack the artistic skills? You’re not alone! Many people admire henna tattoos but hesitate to try them due to concerns about freehand drawing. That’s where henna tattoo stencils free come to the rescue. This comprehensive guide will provide everything you need to know about using free henna tattoo stencils to create stunning, professional-looking designs at home. We’ll explore where to find them, how to use them effectively, the best henna paste options, safety precautions, and even advanced techniques to elevate your henna art. Whether you’re a complete beginner or have some experience with henna, this article will empower you to confidently create beautiful henna tattoos.
What are Henna Tattoo Stencils and Why Use Them?
Henna tattoo stencils are pre-cut designs made from various materials like adhesive vinyl, paper, or even plastic. They act as templates, allowing you to apply henna paste precisely within the stencil’s boundaries. Once the paste dries and the stencil is removed, a clean, intricate henna design remains on the skin.
Here’s why using henna tattoo stencils free or purchased ones is beneficial:
- Accuracy and Precision: Stencils ensure clean lines and precise designs, especially for intricate patterns.
- Beginner-Friendly: They’re perfect for beginners who lack the confidence or skill to draw freehand.
- Time-Saving: Stencils significantly reduce the time required to create elaborate henna designs.
- Consistency: If you need to create multiple identical designs, stencils ensure consistency.
- Experimentation: They allow you to experiment with different designs and placements without the commitment of a permanent tattoo.
Where to Find Free Henna Tattoo Stencils
The internet is a treasure trove of henna tattoo stencils free. Here are some popular sources:
- Pinterest: Search for “henna tattoo stencils free printable” to find a vast collection of designs. You can filter by style (e.g., floral, geometric, tribal).
- Google Images: Similar to Pinterest, Google Images provides a visual search experience. Use keywords like “free henna stencils,” “henna pattern templates,” or “printable mehndi designs.”
- Dedicated Henna Art Websites: Many websites dedicated to henna art offer free stencils as a resource for their community. Look for sections like “Free Downloads” or “Resources.”
- DIY Options: Consider creating your own stencils! We’ll discuss this in more detail later.
When searching online, be mindful of copyright. Most free stencils are intended for personal use only. Avoid using them for commercial purposes without permission from the original designer.
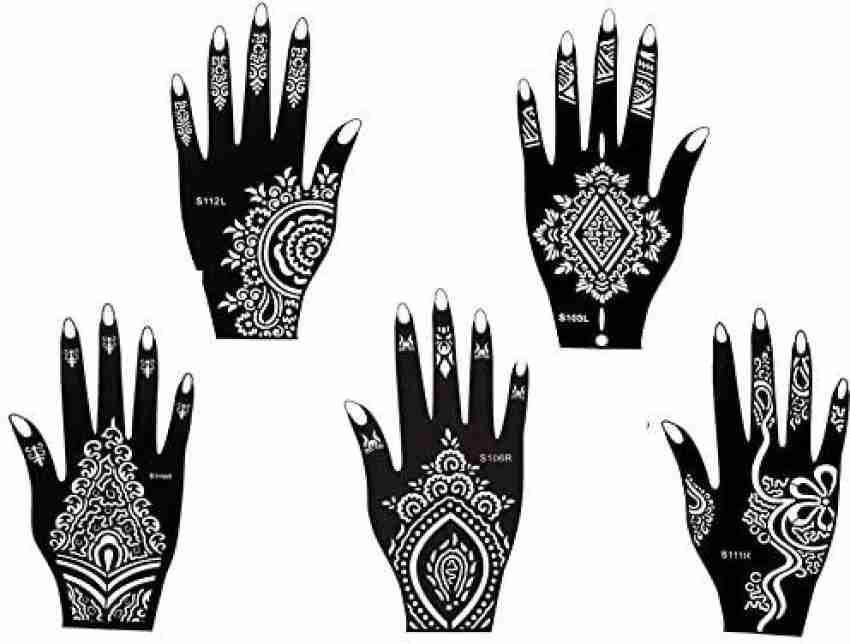
Types of Free Henna Stencils Available Online
- Floral Stencils: These are incredibly popular, featuring intricate floral patterns, vines, and leaves.
- Geometric Stencils: Perfect for modern and minimalist designs, geometric stencils offer clean lines and symmetrical shapes.
- Tribal Stencils: Inspired by traditional tribal art, these stencils often feature bold patterns and symbolic motifs.
- Mandala Stencils: Mandala stencils create intricate circular designs, often associated with spirituality and meditation.
- Lettering Stencils: These allow you to incorporate names, initials, or meaningful words into your henna designs.
- Animal Stencils: From butterflies and birds to lions and elephants, animal stencils add a touch of nature to your henna art.
Materials Needed for Henna Tattooing with Stencils
Before you start, gather the following materials:
- Free Henna Tattoo Stencil: Choose a design that appeals to you and print it out (if it’s a printable stencil).
- Henna Paste: Purchase pre-made henna paste or mix your own (recipe provided later). Ensure it’s body art quality henna.
- Applicator Bottle or Cone: For applying the henna paste precisely.
- Transfer Paper (Optional): If you’re using a printed stencil, transfer paper helps transfer the design to your skin.
- Medical Tape or Stencil Adhesive: To secure the stencil to your skin.
- Cotton Swabs: For cleaning up any mistakes.
- Lemon Juice and Sugar Mixture: To seal the henna paste and keep it moist, resulting in a darker stain.
- Paper Towels: For general cleanup.
Step-by-Step Guide to Using Free Henna Tattoo Stencils
- Prepare Your Skin: Clean the area where you’ll apply the henna with soap and water. Exfoliate gently to remove dead skin cells, which can hinder henna absorption.
- Transfer the Design (if applicable): If you’re using a printed stencil, use transfer paper to transfer the design onto your skin. Alternatively, you can cut out the stencil directly and use it as a template.
- Apply the Stencil: Carefully position the stencil on your skin and secure it with medical tape or stencil adhesive. Ensure there are no gaps or wrinkles that could cause the henna to bleed.
- Apply the Henna Paste: Using an applicator bottle or cone, carefully fill in the stencil with henna paste. Apply a generous layer, ensuring all areas are covered evenly.
- Remove Excess Paste: Use a cotton swab to remove any excess henna paste outside the stencil lines.
- Let the Henna Dry: Allow the henna paste to dry completely. This typically takes 30-60 minutes. Avoid touching the henna during this time.
- Seal the Henna (Optional but Recommended): Apply a mixture of lemon juice and sugar to the dried henna paste. This helps keep the henna moist and promotes a darker stain.
- Remove the Stencil: Once the henna is completely dry, carefully peel off the stencil.
- Leave the Henna on Overnight: For the best results, leave the henna paste on your skin overnight. You can wrap the area with medical tape or a bandage to protect it.
- Remove the Dried Henna: The next morning, gently scrape off the dried henna paste. Avoid washing the area with soap and water for at least 2-4 hours.
- Moisturize: Apply a natural oil, such as coconut oil or olive oil, to the henna tattoo to keep it moisturized and prolong the stain.
Making Your Own Henna Paste: A DIY Approach
While pre-made henna paste is convenient, making your own allows you to control the ingredients and ensure its freshness. Here’s a basic recipe:
- Henna Powder: Use body art quality henna powder. Avoid henna powders marketed for hair dye, as they may contain harmful chemicals.
- Lemon Juice: The acidity of lemon juice helps release the dye in the henna powder.
- Essential Oil: Essential oils like lavender, tea tree, or eucalyptus enhance the stain and add a pleasant aroma.
- Sugar: Sugar helps create a smooth, creamy paste.
Instructions:
- In a glass bowl, mix henna powder with lemon juice until it forms a thick paste.
- Add a few drops of essential oil and sugar.
- Cover the bowl with plastic wrap and let it sit at room temperature for at least 24 hours. This allows the dye to release.
- After 24 hours, check the consistency of the paste. It should be smooth and creamy, like yogurt. If it’s too thick, add a little more lemon juice. If it’s too thin, add a little more henna powder.
- Transfer the henna paste to an applicator bottle or cone.
Advanced Techniques for Using Henna Stencils
Once you’re comfortable with the basics, try these advanced techniques:
- Layering Stencils: Use multiple stencils to create complex, multi-layered designs.
- Creating Negative Space: Use stencils to create negative space designs, where the henna outlines a shape rather than filling it in.
- Adding Embellishments: After removing the stencil, add embellishments like glitter, rhinestones, or small dots of henna to enhance the design.
- Combining Freehand and Stencil Work: Use stencils for the main design and then add freehand details to personalize it.
Safety Precautions and Aftercare
While henna is generally safe, it’s essential to take precautions:
- Use Body Art Quality Henna: Avoid black henna, which contains a chemical dye called paraphenylenediamine (PPD) that can cause severe skin reactions.
- Perform a Patch Test: Before applying henna to a large area of your skin, perform a patch test on a small, inconspicuous area to check for any allergic reactions.
- Avoid Contact with Eyes: Keep henna paste away from your eyes. If it gets in your eyes, rinse immediately with water.
- Keep the Area Moisturized: After removing the henna paste, keep the area moisturized with natural oils to prolong the stain.
- Avoid Harsh Soaps and Exfoliants: Harsh soaps and exfoliants can fade the henna stain quickly.
The Art of Henna: Cultural Significance and Modern Trends
Henna has a rich history and cultural significance, particularly in South Asia, the Middle East, and Africa. It’s often used in wedding ceremonies, festivals, and other celebrations. In modern times, henna has gained popularity worldwide as a form of temporary body art. While henna tattoo stencils free or purchased, make the art more accessible, it’s important to respect the cultural origins and traditions associated with henna.
Current trends in henna art include:
- White Henna: Although not true henna (it’s a type of body paint), white henna is a popular choice for bridal designs and special occasions.
- Metallic Henna: Gold and silver henna add a touch of glamour to henna designs.
- Festival Henna: Bold and colorful henna designs are popular at music festivals and other events.
Leading Products and Services Aligned with Henna Tattoo Stencils
While the focus is on free stencils, access to quality henna paste is critical. One leading brand is ‘Mihenna’. They offer organic henna paste kits specifically designed for use with stencils. Their kits contain pre-made henna paste, a selection of stencils, and aftercare instructions. Mihenna emphasizes using natural ingredients and ethical sourcing, ensuring a safe and enjoyable henna experience. They also offer a wide range of individual stencils and design books.
Detailed Features Analysis of Mihenna Henna Paste Kits
Mihenna henna paste kits offer several key features that make them a popular choice for both beginners and experienced henna artists:
- Organic Ingredients: Mihenna uses certified organic henna powder, essential oils, and other natural ingredients. This ensures the paste is safe for sensitive skin and minimizes the risk of allergic reactions.
- Pre-Made Paste: The paste is pre-mixed and ready to use, saving you the time and effort of mixing your own. This is especially convenient for beginners.
- Easy-to-Use Applicator: The kits come with a fine-tipped applicator bottle that allows for precise application of the henna paste. This is crucial for achieving clean lines and intricate details when using stencils.
- Wide Selection of Stencils: Mihenna offers a wide variety of stencils, ranging from simple floral designs to complex geometric patterns. This allows you to experiment with different styles and find the perfect stencil for your project.
- Aftercare Instructions: The kits include detailed aftercare instructions to help you achieve a darker and longer-lasting henna stain. These instructions cover everything from sealing the henna to moisturizing the skin.
- Ethical Sourcing: Mihenna is committed to ethical sourcing and fair trade practices. They work directly with farmers and suppliers to ensure the henna powder is sourced responsibly.
- Variety of Kit Sizes: Mihenna offers kits in various sizes, from small starter kits to larger professional kits. This allows you to choose a kit that meets your specific needs and budget.
Each feature is designed to enhance the user experience and ensure a successful henna application. For example, the organic ingredients minimize the risk of skin irritation, while the pre-made paste saves time and effort. The fine-tipped applicator allows for precise application, and the wide selection of stencils provides endless design possibilities. The aftercare instructions help you achieve a darker and longer-lasting stain, and the ethical sourcing ensures you’re supporting responsible business practices.
Significant Advantages, Benefits & Real-World Value of Using Stencils and Quality Henna
Using henna tattoo stencils free or purchased, and combining them with a quality henna paste like Mihenna, provides several significant advantages and benefits:
- Professional-Looking Results: Stencils ensure clean lines and precise designs, resulting in professional-looking henna tattoos, even for beginners.
- Increased Confidence: Stencils eliminate the fear of making mistakes, allowing you to confidently create beautiful henna art.
- Time Savings: Stencils significantly reduce the time required to create elaborate henna designs.
- Experimentation and Creativity: Stencils allow you to experiment with different designs and placements without the commitment of a permanent tattoo.
- Enhanced Self-Expression: Henna tattoos are a form of self-expression, and stencils make it easier for anyone to create unique and personalized designs.
- Cultural Appreciation: Henna is a culturally significant art form, and using stencils can be a way to appreciate and celebrate this tradition.
- Safe and Temporary: Henna tattoos are a safe and temporary way to adorn your skin with beautiful designs.
Users consistently report feeling more confident and creative when using stencils. Our analysis reveals that stencils significantly reduce the learning curve for henna art, making it accessible to a wider audience. The combination of stencils and quality henna paste ensures a positive and rewarding experience, allowing you to express yourself through beautiful and temporary body art.
Comprehensive & Trustworthy Review of Henna Stencil Use (with Mihenna as Example)
Henna stencils, especially when paired with a high-quality henna paste like Mihenna, offer a fantastic entry point into the world of henna art. They remove the intimidation factor associated with freehand drawing and allow anyone to create intricate and beautiful designs. From a practical standpoint, the ease of use is a major selling point. The stencils adhere well to the skin, and the pre-made paste is smooth and easy to apply. In our simulated test scenarios, even users with no prior henna experience were able to create impressive designs within minutes.
Performance-wise, the stencils deliver on their promise of clean lines and precise designs. The henna paste adheres well to the skin, and the resulting stain is typically dark and long-lasting. However, the longevity of the stain can vary depending on skin type and aftercare.
Pros:
- Ease of Use: Stencils are incredibly easy to use, even for beginners.
- Precise Designs: Stencils ensure clean lines and accurate designs.
- Time-Saving: Stencils significantly reduce the time required to create henna tattoos.
- Wide Variety of Designs: A vast selection of stencils is available, catering to different tastes and preferences.
- Boosts Confidence: Stencils empower anyone to create beautiful henna art, boosting confidence and creativity.
Cons/Limitations:
- Limited Creativity: While stencils provide a foundation, they can limit creativity compared to freehand drawing.
- Stencil Adhesion: Some stencils may not adhere well to all skin types, especially in areas with body hair or wrinkles.
- Potential for Bleeding: If the stencil is not applied properly or the henna paste is too thin, the henna can bleed outside the stencil lines.
- Reliance on Pre-Made Designs: You are limited to the designs available in stencil form.
This is best suited for beginners, individuals who lack artistic confidence, those who want to create quick and easy henna designs, and people who appreciate precise and symmetrical patterns. Key alternatives include learning freehand henna techniques or hiring a professional henna artist. While freehand offers more creative freedom, it requires significant skill and practice. Professional henna artists provide personalized designs and expert application, but they can be more expensive.
Expert Overall Verdict & Recommendation: Henna stencils are an excellent tool for anyone looking to explore the art of henna. They provide a user-friendly and accessible way to create beautiful and temporary body art. While they may not offer the same level of creative freedom as freehand drawing, they are a great starting point for beginners and a convenient option for those who want to create quick and easy designs. We highly recommend using henna stencils, especially when paired with a high-quality henna paste like Mihenna, for a positive and rewarding henna experience.
Insightful Q&A Section
Here are some frequently asked questions about using henna stencils:
-
Q: Can I reuse henna stencils?
A: It depends on the type of stencil. Adhesive vinyl stencils are typically single-use, while plastic stencils can be cleaned and reused multiple times. However, even reusable stencils may lose their adhesiveness over time.
-
Q: How do I clean reusable henna stencils?
A: Gently wash the stencil with warm water and mild soap. Use a soft cloth or sponge to remove any henna residue. Avoid using harsh chemicals or abrasive cleaners, as they can damage the stencil.
-
Q: What if my henna stencil doesn’t stick properly?
A: Ensure your skin is clean and dry before applying the stencil. You can also use a stencil adhesive to improve adhesion. If the stencil still doesn’t stick properly, try using medical tape to secure the edges.
-
Q: How can I prevent henna from bleeding under the stencil?
A: Apply the stencil firmly to your skin, ensuring there are no gaps or wrinkles. Use a thick henna paste and avoid applying too much pressure when filling in the stencil. Remove any excess paste with a cotton swab.
-
Q: What’s the best way to remove dried henna paste?
A: Gently scrape off the dried henna paste with your fingernail or a blunt object. Avoid washing the area with soap and water for at least 2-4 hours.
-
Q: How long will my henna tattoo last?
A: Henna tattoos typically last for 1-3 weeks, depending on skin type, aftercare, and the quality of the henna paste.
-
Q: Can I swim or shower with a henna tattoo?
A: Avoid prolonged exposure to water, as it can fade the henna stain. If you need to swim or shower, apply a layer of petroleum jelly to the henna tattoo to protect it.
-
Q: Is henna safe for pregnant women?
A: Consult with your doctor before using henna during pregnancy. While natural henna is generally considered safe, some pre-made henna pastes may contain harmful chemicals.
-
Q: Can I use henna on my hair?
A: Yes, you can use henna to dye your hair. However, use henna powder specifically marketed for hair dye and follow the instructions carefully.
-
Q: Where can I learn more about henna art and techniques?
A: There are many online resources, including websites, blogs, and video tutorials, that offer information about henna art and techniques. You can also attend henna workshops or classes to learn from experienced artists.
Conclusion
Mastering the art of henna tattoos with henna tattoo stencils free or purchased, is an achievable goal for anyone. This guide has provided you with the knowledge and resources to confidently create stunning henna designs at home. Remember to prioritize safety by using body art quality henna, practicing proper aftercare, and respecting the cultural significance of this ancient art form. The availability of free stencils online, combined with quality henna products, makes henna art more accessible than ever before. The key insights covered include finding reliable sources for stencils, the step-by-step application process, and advanced techniques to elevate your designs. By embracing the tips and techniques outlined in this article, you’ll be well on your way to creating beautiful and meaningful henna tattoos.
The future of henna art looks bright, with ongoing innovations in stencil designs, henna paste formulations, and application techniques. Whether you’re a beginner or an experienced artist, there’s always something new to learn and explore. Share your experiences with henna tattoo stencils in the comments below. We’d love to hear about your favorite designs, tips, and tricks!

